
Migrating your WordPress Website Domain Name: A Step by Step Guide

A domain name is simply the URL of your website (the URL can be read as www.domainname.com/in/org, etc.). Computer terminals use IP addresses to identify each other and exchange information. However, as humans, remembering a meaningless string of numbers can be difficult. Therefore, the IP address of the web server is associated with a domain name. The site owner is required to register a unique domain name before using it.
Usually, websites do not change the domain name. However, there can be scenarios under which you might want to migrate your site’s name. In this article, we will provide a step-by-step guide and tools to help you migrate the domain name of your WordPress website.
A Guide for migrating your WordPress website’s domain name
1. Backup your website
As the rule of the thumb, it is important to back up your website before making any major changes to it. WordPress offers a wide range of backup plugins to help you take a backup of your site. The backup can be stored on the cloud or even on your local computer. While a WP Hosting provider usually offers automatic daily backups, we recommend that you take a manual backup yourself before migrating the domain name.
2. Connect the backup to your new website using FTP
Using a tool like FileZilla, you can now connect your new website to the backup. As soon as the connection is made, create a copy of the backup file to the root directory of your new site. At this stage, you must change the file name and URL so that the new domain name works.
3. Setting up the new website
For setting up your new site, you can use the plugin – Duplicator. On the installer screen of this tool, select the option ‘Table Removal’. This ensures that the database is empty on our new site.
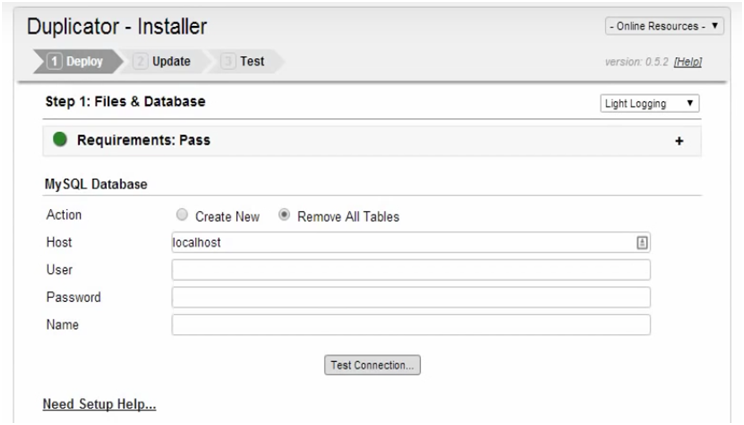
Next, select the option ‘I have read all the warning and notices’. Click ‘Run Deployment’. In Step 2, you will be asked to input the old and new domain names – do so carefully.

Now, login to the admin panel using the original username and password. Also, if everything seems okay, take a backup of the first instance of your new site.
Finally, delete all unnecessary files (including the installer) and re-initiate the permalinks.
Implementing 301 redirects and notifying Google
After following the steps mentioned above, it’s time to set up 301 redirects. You can do this by deploying a .htaccess hack. This can be found in the wp- includes or wp- admin folder. Use the following code:
#Options +FollowSymLinks
RewriteEngine on
RewriteRule^(.*)$ http://www.newdomainname.com/$1 [R=301,L]
To complete the redirect process, replace ‘newdomainname’ with your site’s new name. Finally, use the Google Search Console and inform Google about the change.
Summing Up
Remember, migrating a domain name is a slightly complex process. Most site owners find it easier to employ an expert for the job. We hope the article helps you understand the process and helps you in your journey to migrate your domain name. Good Luck!